


How to Make an Instructional Video With Screen Recording
As our world becomes more digital, instructional videos are increasingly prevalent. These videos are particularly useful for demonstrating how to use software or explaining complex procedures. An essential part of making an instructional video involves screen recording, which captures the actions taken on a computer screen. If you’ve ever wondered how to make instructional video with screen recording, this article is for you. We will cover the basics, some advanced techniques, and even how to make an instructional video with screen recording for free.
Choosing the Right Screen Recording Software

The first and most crucial step when creating an instructional video is selecting the right screen recording software. A good software choice allows you to create clear, high-quality videos and offers features that align with your requirements, be it short clips or lengthy tutorials. There is a multitude of free and paid options available on the market, with varying features and capabilities.
Free options, like OBS Studio, offer basic screen recording capabilities but may lack advanced features such as editing or effects. On the other hand, paid solutions, like Camtasia, provide a broader suite of tools including integrated editing, but they come with a cost and can be complex to use for beginners. This leads us to consider an optimal alternative that combines the best of both worlds – quality, simplicity, and affordability. One such alternative is elai.io.
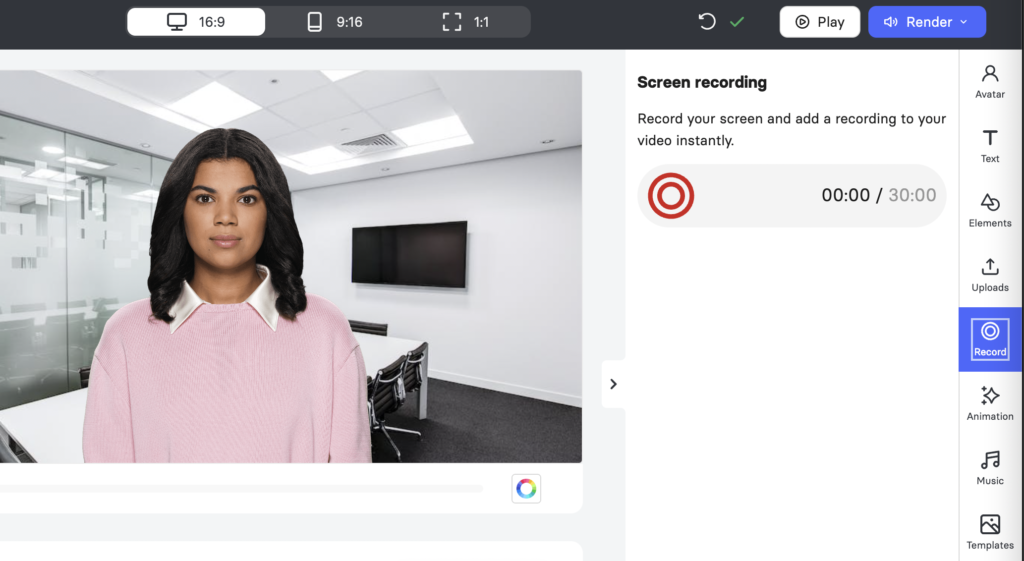
Elai.io is a revolutionary platform that not only provides robust screen recording features but also offers an integrated, easy-to-use editing suite. Elai.io’s screen recorder is intuitive, ensuring that even first-time users can easily navigate and capture their screens efficiently. Its customizable recording area allows you to either record the entire screen or select specific sections, depending on your requirements.
Unlike many free alternatives, elai.io ensures your recordings are high quality, offering crisp visuals and clear audio that result in professional-looking videos. It is ideal for capturing step-by-step processes, demonstrating software usage, or narrating slide presentations.
What sets elai.io apart is its all-in-one approach. Beyond the screen recording, it offers a range of post-production tools. You can trim your videos, add annotations, captions, and effects directly within the platform. This feature eliminates the need for separate editing software, making the entire process of creating an instructional video seamless and straightforward.
Moreover, Elai.io is a web-based solution, meaning you can access your projects from any device, at any time, without the need for downloading hefty software or worry about compatibility issues. It’s as simple as opening your browser, logging in, and starting your recording or editing process.
Finally, Elai.io offers different subscription plans, including a free version, making it accessible for different needs and budgets. And for the value it provides, the paid plans are reasonably priced, offering additional features like unlimited recording time, more storage space, and priority support.
In conclusion, if you’re wondering how to make instructional videos with screen recording with a software that offers easy-to-use screen recording, integrated editing tools, high-quality outputs, and excellent value for money, then elai.io is an exceptional choice. By selecting elai.io as your screen recording software, you’re setting yourself up for success in creating compelling and effective instructional videos.
Preparing for Your Screen Recording
Before you start recording, take some time to prepare. Script out what you will say, and plan the actions you will take on your screen. Run through the script and the on-screen actions a few times to ensure you’re comfortable. Remember, the more prepared you are, the smoother your video will be.
Recording Your Screen
Once you’ve chosen your screen recording software and adequately prepared, it’s time to embark on the core process – recording your screen. This crucial step forms the backbone of your instructional video, and how you execute it can significantly impact the effectiveness of your final output. Here’s a more in-depth look at the steps you should take to ensure a smooth and effective screen recording session.
Start by launching your chosen screen recording software. Take a moment to familiarise yourself with the interface if it’s your first time using it. Look for key features such as the record button, pause button, stop button, and settings options.
One of the first settings to pay attention to is the recording area. This feature allows you to specify what portion of your screen you wish to record. Depending on the software you use, you may have the option to record the entire screen, a specific window, or a custom area. If your instructional video involves a specific application or program, you may want to record just that window. If you’re showing something that involves your entire screen, like how to arrange a desktop or use the taskbar, then full-screen recording may be more appropriate.
Another crucial setting is audio. If you’re narrating the instructions as you go, you’ll need to ensure that your microphone is set up correctly. Check that your chosen screen recording software recognizes your microphone and that the audio levels are appropriate. Remember, your voice should be clear and audible but not too loud that it’s distorting. If your software offers audio monitoring, use it to check your levels before starting the recording.
Now that your setup is complete, it’s time to hit the record button and start your instructional video. As you perform actions on your screen, narrate them clearly. Use the script you’ve prepared as a guide, but remember to keep your tone conversational and engaging.
One important tip to remember during the recording process is to keep your pace slow and steady. This might feel unnatural, especially if you’re proficient in the tasks you’re demonstrating, but remember that your viewers may be seeing this information for the first time. They need time to absorb what you’re saying and showing.
Throughout the recording, don’t be discouraged by mistakes. Even seasoned professionals make them. Most screen recording software offers a pause feature, which allows you to halt the recording, correct your error, compose yourself, and then continue. In many cases, you can also cut out these errors during the editing process.
Finally, when you’re done, hit the stop button to end your recording. Depending on your software, your recorded video will be saved automatically to a specified folder or be available in the software interface for preview and editing.
Screen recording might seem like a simple task, but the way you approach it can significantly affect your video’s outcome. By setting up correctly, keeping a steady pace, narrating clearly, and embracing your mistakes, you’re on the right track to create a high-quality and impactful instructional video.
Post-Recording Editing
Once the screen recording process is complete, it’s time to dive into the critical stage of post-recording editing. This is where your raw screen recording becomes an engaging instructional video. The editing process may seem daunting to some, but with the right tools and an understanding of the basics, you can create an exceptional video that captivates your audience and conveys your information effectively.
Firstly, it’s essential to load your raw footage into your chosen editing software. The software you select can be the same as your screen recording software, especially if you’re using a platform like elai.io, which offers integrated editing tools, or you may opt for a different program such as Adobe Premiere Pro or Final Cut Pro if you require more advanced editing capabilities.
Once you have your footage loaded, the first thing you should focus on is trimming. Trimming your video is the process of cutting out any unnecessary footage or mistakes. This might include long pauses, misspoken words, or any distractions that occurred during the recording. Aim to keep your video concise and to the point. By eliminating any irrelevant footage, you ensure that your viewers stay engaged and focused on the content.
Another important editing aspect is the addition of titles and captions. These can provide your viewers with crucial context about what they’re watching, making it easier for them to understand the material. Titles can be used to introduce new sections or concepts, while captions can be used to provide a textual representation of the spoken content. This enhances the accessibility of your video, allowing viewers who are hard of hearing, non-native speakers, or even those who prefer to watch with the sound off, to benefit from your content.
Adding effects is another way to make your video more engaging. These can include transitions, animations, zoom-ins, highlights, or pointer effects. For example, a smooth transition can help move from one idea to the next, while a zoom-in can focus on a specific area of the screen that you want your viewers to pay attention to. Be mindful when using effects. Overuse can make your video seem cluttered and may distract from the core content. Subtlety is key here; use effects to enhance your message, not overshadow it.
Finally, consider adding background music or sound effects to your video. These can set the mood, grab attention, or emphasise points. However, like visual effects, these should be used sparingly and should not distract from the instructional content. Ensure any background music is at a low volume so it doesn’t overshadow the spoken content.
Post-recording editing is where the magic happens. It’s where you transform your screen recording into an effective and engaging instructional video. By carefully trimming your video, adding titles and captions, using effects wisely, and potentially adding audio elements, you enhance your viewers’ experience and improve their understanding of the content. Remember, the goal is to convey your information as clearly and effectively as possible.
Exporting and Sharing Your Video
Upon completing the editing process, you’ve reached the final step in creating your instructional video – exporting and sharing it with your audience. This part of the process is just as crucial as the rest, ensuring that your content reaches your audience in a format that’s suitable for their viewing.
When it comes to exporting your video, you need to pay attention to several settings. These include the file format, video resolution, frame rate, and video and audio codecs. These settings are usually adjustable in your editing software and can be tweaked based on your requirements.
The file format you choose should align with where you plan to share your video. Most online platforms prefer the MP4 format due to its excellent balance between quality and file size. However, if your video is meant for professional use and may require further editing, a high-quality format like MOV or AVI might be more suitable.
The resolution and frame rate of your video often depend on the original screen recording settings. If you recorded your screen in 1080p, then you should export your video in the same resolution to maintain quality. The same goes for the frame rate. Most screen recordings are done at 30 frames per second (fps), which is sufficient for most instructional videos and widely accepted across online platforms.
Video and audio codecs are more technical aspects of your export settings, but they are essential to ensure your video plays back correctly. Most editing software will select these automatically based on your chosen file format, but if you have to select them manually, H.264 for video and AAC for audio are widely accepted and offer good quality.
Once you’ve successfully exported your video, the next step is sharing it with your intended audience. There are various ways you can do this. If your audience is vast and varied, a video-sharing platform like YouTube or Vimeo might be the best way to reach them. Both platforms allow you to upload your videos and share the link with anyone. Alternatively, if your video is meant for a more targeted audience, such as a classroom or a group of employees, you might choose to share it via email or a learning management system (LMS).
Exporting and sharing your video is a critical final step in the process of creating an instructional video. By choosing the correct export settings and sharing method, you ensure that your content is accessible and enjoyable for your audience. Remember, the ultimate goal is for your audience to learn from your content, so making it easy for them to access and view your video is key.
Conclusion
Creating an instructional video with screen recording doesn’t have to be daunting. By choosing the right software, preparing thoroughly, recording carefully, and editing wisely, you can create an effective and engaging instructional video. It’s a fantastic way to share your knowledge and expertise with others, whether you’re teaching a software tutorial, explaining a complex concept, or simply sharing tips and tricks.
We hope this guide on how to make an instructional video with screen recording has been helpful. With these tips and tricks in mind, you’ll be well on your way to creating top-notch instructional videos that educate, inform, and engage.
Remember, the key to making successful instructional videos is practice. The more videos you make, the better you’ll become at delivering your message effectively. So, start practising now and create your first instructional video today!